
Jump to
Short answer: how to remove background from real estate photos safely
You can remove background clutter and isolate furniture for marketing cutouts, but do it without altering permanent features, structural elements, or the true view. For listing photos, favor minimal, non-deceptive edits: remove transient items (trash, cables), tidy surfaces, and use localized cloning or healing tools. For marketing assets and virtual staging, create separate, clearly labeled images and keep original files and mask layers for audit. Always disclose virtual staging or significant edits in captions or property descriptions and confirm your broker, MLS, or advertising rules before publishing.
Below are practical steps, a decision table, tooling notes, and ethical guardrails to help you edit responsibly.
When to remove backgrounds — appropriate use cases and clear limits
Appropriate uses
- Remove transient clutter: take out boxes, cords, trash, and temporary personal items to show the space clearly.
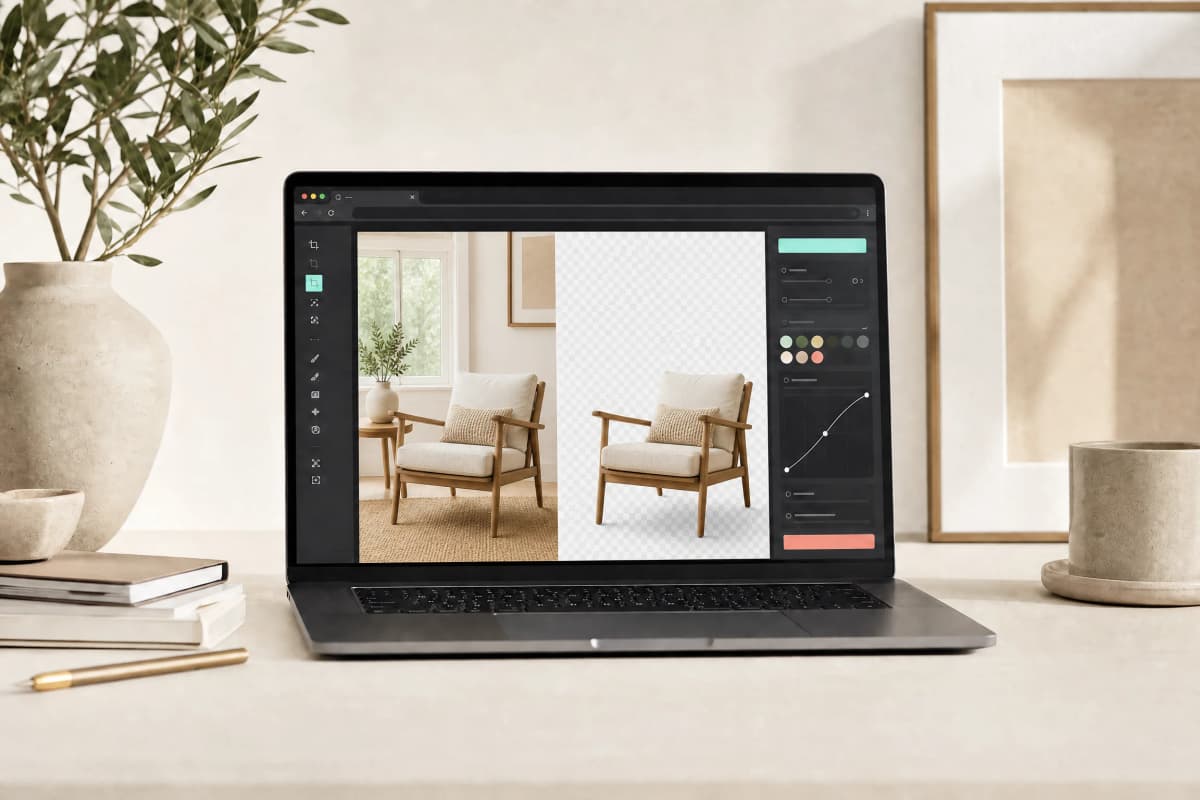
- Isolate furniture or decor: export clean cutouts (PNGs with transparency) for brochures, catalogs, or virtual staging.
- Create feature tiles: use appliance or finish cutouts in marketing pages or comparison graphics.
Not appropriate for listing images
- Do not remove or replace structural elements such as walls, doors, windows, or permanent fixtures.
- Do not alter or replace the view from windows if it affects buyer expectations or value.
- Do not change obvious condition issues (damaged countertops, water stains) in listing images.
Decide before you edit whether an image is intended as a factual listing photo or a marketing asset. Use stricter standards for listing photos and provide clear disclosures for any non-factual images.
Decision table: remove background from real estate photos?
| Scenario | OK to remove / edit | Not OK / avoid |
|---|---|---|
| Temporary clutter (boxes, cords) | Yes — remove or tidy | — |
| Isolate sofa or chair for marketing cutout | Yes — for brochures or virtual staging if labeled | Do not use as factual listing image unless context is unchanged |
| View out of window (temporary obstruction) | Prefer showing the true view; disclose obstruction | Replacing view with a different skyline or greenery |
| Structural change (remove wall or door) | Never | Never |
Workflow: safe, auditable background cleanup (step-by-step)
-
Decide the intended use
- Tag the image as “listing photo,” “marketing brochure,” or “virtually staged mockup.” Apply stricter rules to listing photos.
-
Back up originals and document edits
- Save originals in a folder like originals/. Keep edited files in edits/ and marketing assets in marketing/. Maintain an edit log CSV or text file with filename, date, and changes made.
-
Remove transient clutter first
- Use spot-heal, clone, or careful background removal for small items. Work on a copy and keep the original untouched.
-
Isolate furniture for cutouts (if needed)
- Create precise layer masks and export PNGs with transparent backgrounds for reuse in staging or brochures. See our guide to product-style background removal for techniques and layer handling in the product photo guide.
-
Composite responsibly
- When placing isolated furniture into a scene, match lighting and add realistic shadows. Clearly label virtually staged images in captions or listing fields.
-
Resize and compress for web delivery
- Export appropriate sizes and formats for listing portals and marketing channels. Keep lossless archives for original files. Use an image compressor to reduce file sizes without losing a forensic copy.
-
Add disclosure metadata and visible captions
- Add a caption or listing note such as “Virtually staged” or “Image digitally tidied” whenever the image does not reflect the current, physical condition of the property.
Helpful links: compare browser vs cloud tools in our article on browser and cloud image tools, learn cutout workflows in our product photo background removal guide, and shrink files with our image compressor tool.
Tooling and privacy notes
- Prefer tools that preserve masks and non-destructive layers so edits can be reversed and audited.
- Browser-based editors may allow quick edits without persistent cloud storage; weigh privacy and collaboration needs. Read trade-offs in the browser vs cloud image tools comparison.
- If you produce product-style cutouts, a background remover can speed the isolation step. Consider where property photos are stored and the platform’s privacy terms before uploading sensitive images.
Note: tool capabilities and hosting policies change. Verify current terms and platform features before processing or sharing property photos.
Ethics and legal guardrails
Advertising standards and consumer-protection rules vary by location. In the U.S., consult the current National Association of REALTORS® Internet Advertising Policy and the Federal Trade Commission’s Truth in Advertising guidance before publishing edited images. This is general information, not legal advice; follow the applicable broker, MLS, licensing, and local requirements.
Key rules to follow
- Be truthful: edits must not create materially misleading impressions about the property.
- Preserve proof: keep originals and an edit log in case questions arise.
- Check platform rules: MLS systems and listing portals often have specific image policies—verify current requirements.
- Disclose virtual staging: label any image that does not represent the current, physical state of the property.
These obligations can differ by jurisdiction and over time. Confirm the latest rules from your broker, MLS, and local authorities before publishing.
Quality checklist before publishing listing photos
- Originals backed up and archived.
- Edit log with filenames, dates, and actions.
- No removal or alteration of structural features or views.
- Any virtual staging or heavy compositing clearly disclosed in captions.
- Images sized and compressed for fast loading; use an image compressor for web delivery.
Short example (2–3 minute edit)
- Duplicate the original layer. 2. Use spot-heal to remove a cable and a small box. 3. If isolating a couch, create a mask and export a PNG. 4. Save edited JPEG for listing and store original plus mask in archive. 5. Add caption: “Image digitally tidied” if applicable.
Frequently asked questions
Can I remove a view-blocking construction crane from a window before listing?
No. Removing or replacing a view that materially affects the property’s appeal or value is likely misleading. Either show the true view or provide an accompanying disclosure about temporary obstructions.
Is virtual staging allowed in listings?
Virtual staging can be used for marketing but must be clearly disclosed when the image does not represent the current condition. Also check your MLS or local regulations, which may have specific rules.
How should I label edited photos in a listing?
Use clear terms such as “Virtually staged,” “Digitally tidied,” or “Image edited for marketing” in the photo caption or property description so buyers know the image is not an exact depiction.
Are there privacy issues when using cloud-based editors?
Yes. Cloud editors may store images on third-party servers. If the property or the photos are sensitive, choose a tool and workflow that meet your privacy and client consent requirements.
Do I need permission to edit photos taken by a third-party photographer?
Check the contract or license with the photographer. Many agreements require permission for derivative edits. If in doubt, obtain written permission.
What should I keep for an audit trail?
Keep the original images, all intermediate files (layers and masks), an edit log with timestamps, and exported copies. This helps verify transparency if questions arise.
References
- National Association of Realtors — Advertising and marketing guidance: official source
- Federal Trade Commission — Truth in Advertising: official source
Try it yourself
Need faster cutouts or a simple tidy-up workflow? Try Motionix Background Remover to create furniture cutouts and tidy property photos: Motionix Background Remover.
Related Motionix tools and guides
product photo background removal · browser vs cloud image tools · image compressor
Keep reading
video ·
Extract a Video Frame as PNG Without a Screenshot
Save a decoded video frame for a thumbnail or document, check the selected moment and dimensions, and avoid mistaking PNG export for video repair.
Read
subtitles ·
Fix Subtitle Timing: Offset or Gradual Drift?
Work out whether subtitles need a constant shift or two-point drift correction, then check the repaired SRT or VTT against your actual video.
Readvideo ·
Make a Video Contact Sheet for a Useful Visual Overview
Create a timestamped grid of video frames, choose sampling that suits your review, and understand what a contact sheet can miss.
ReadConversation
Join the conversation
Share a useful question, correction, or practical tip. Comments are reviewed before they appear.
Loading…